
Add a client
Create a client record so you can estimate, schedule and invoice their work.
Updated
On this page
Before you start
You need permission to manage clients. If you do not see the New Client button, ask the owner of your Clevra account.
Create the client
- Open Clients.
- Select New Client.
- Enter the client's Name. It is the only detail Clevra needs.
- Add what you know: Email, Phone and Company.
- Select Create Client.
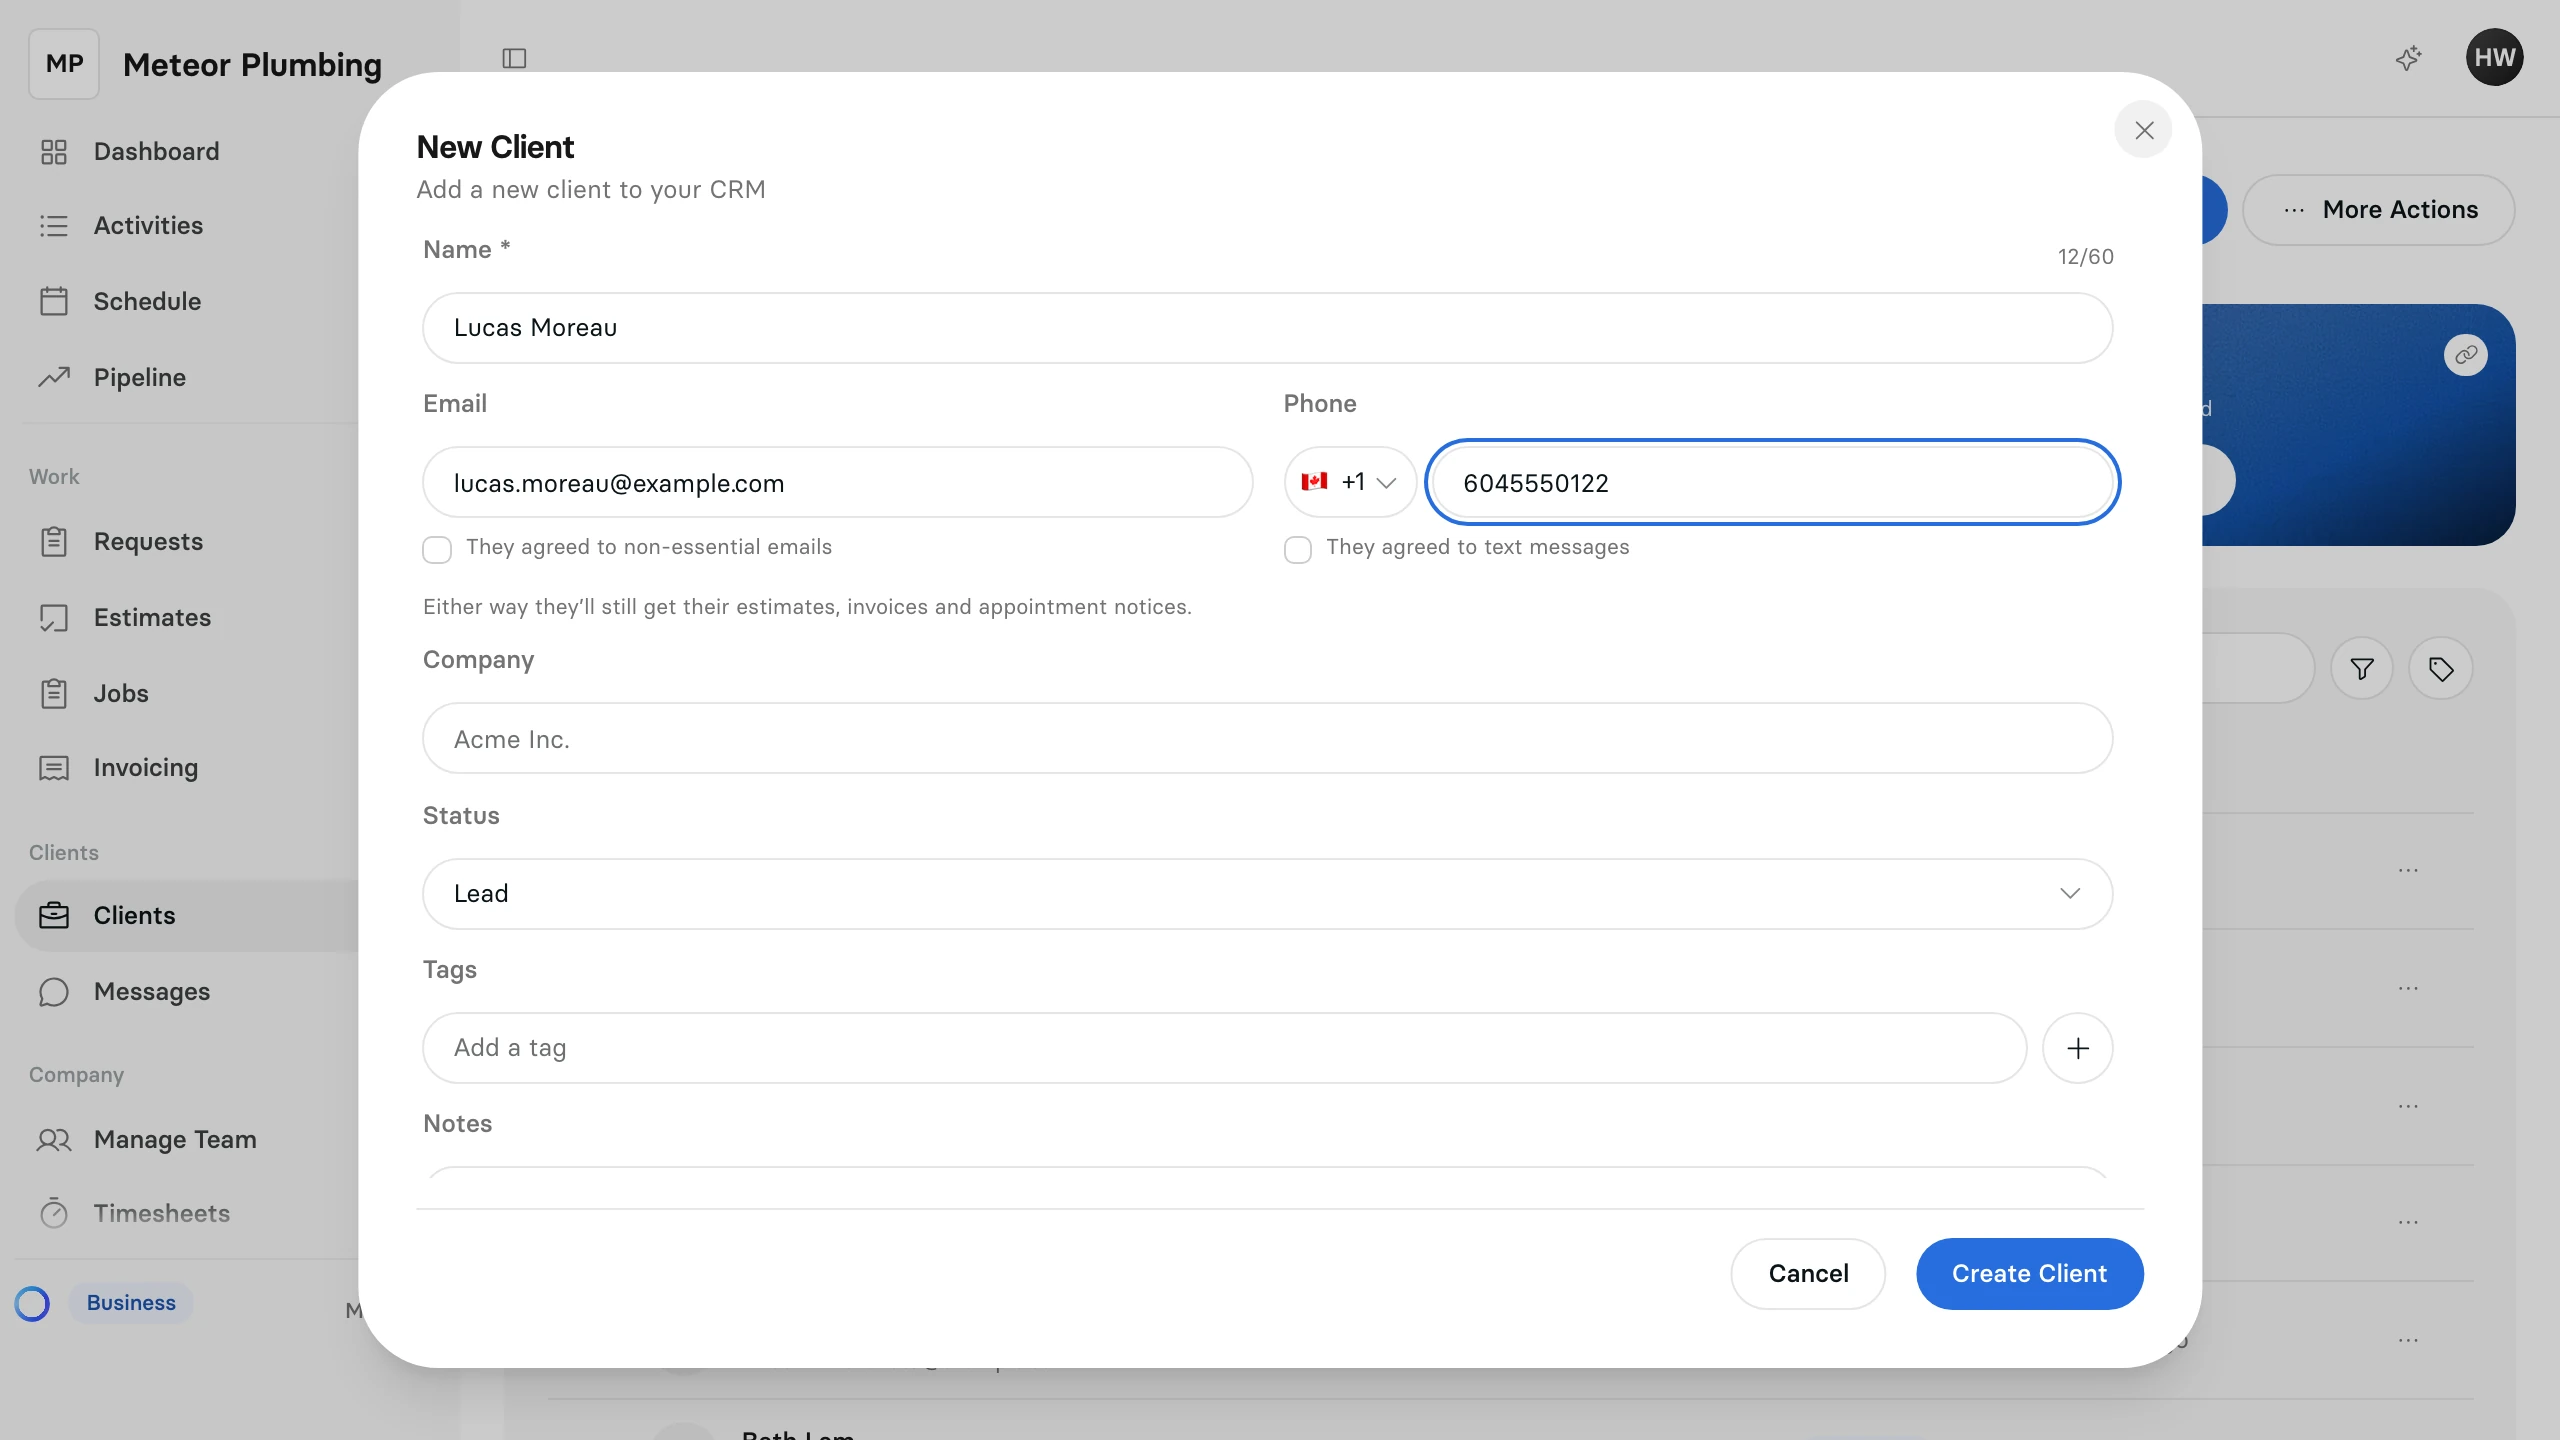
Tick They agreed to non-essential emails or They agreed to text messages only if the client said yes. Estimates, invoices and appointment notices reach them either way.
A new client starts with the status Lead. Change Status as the relationship moves on.
Add a property
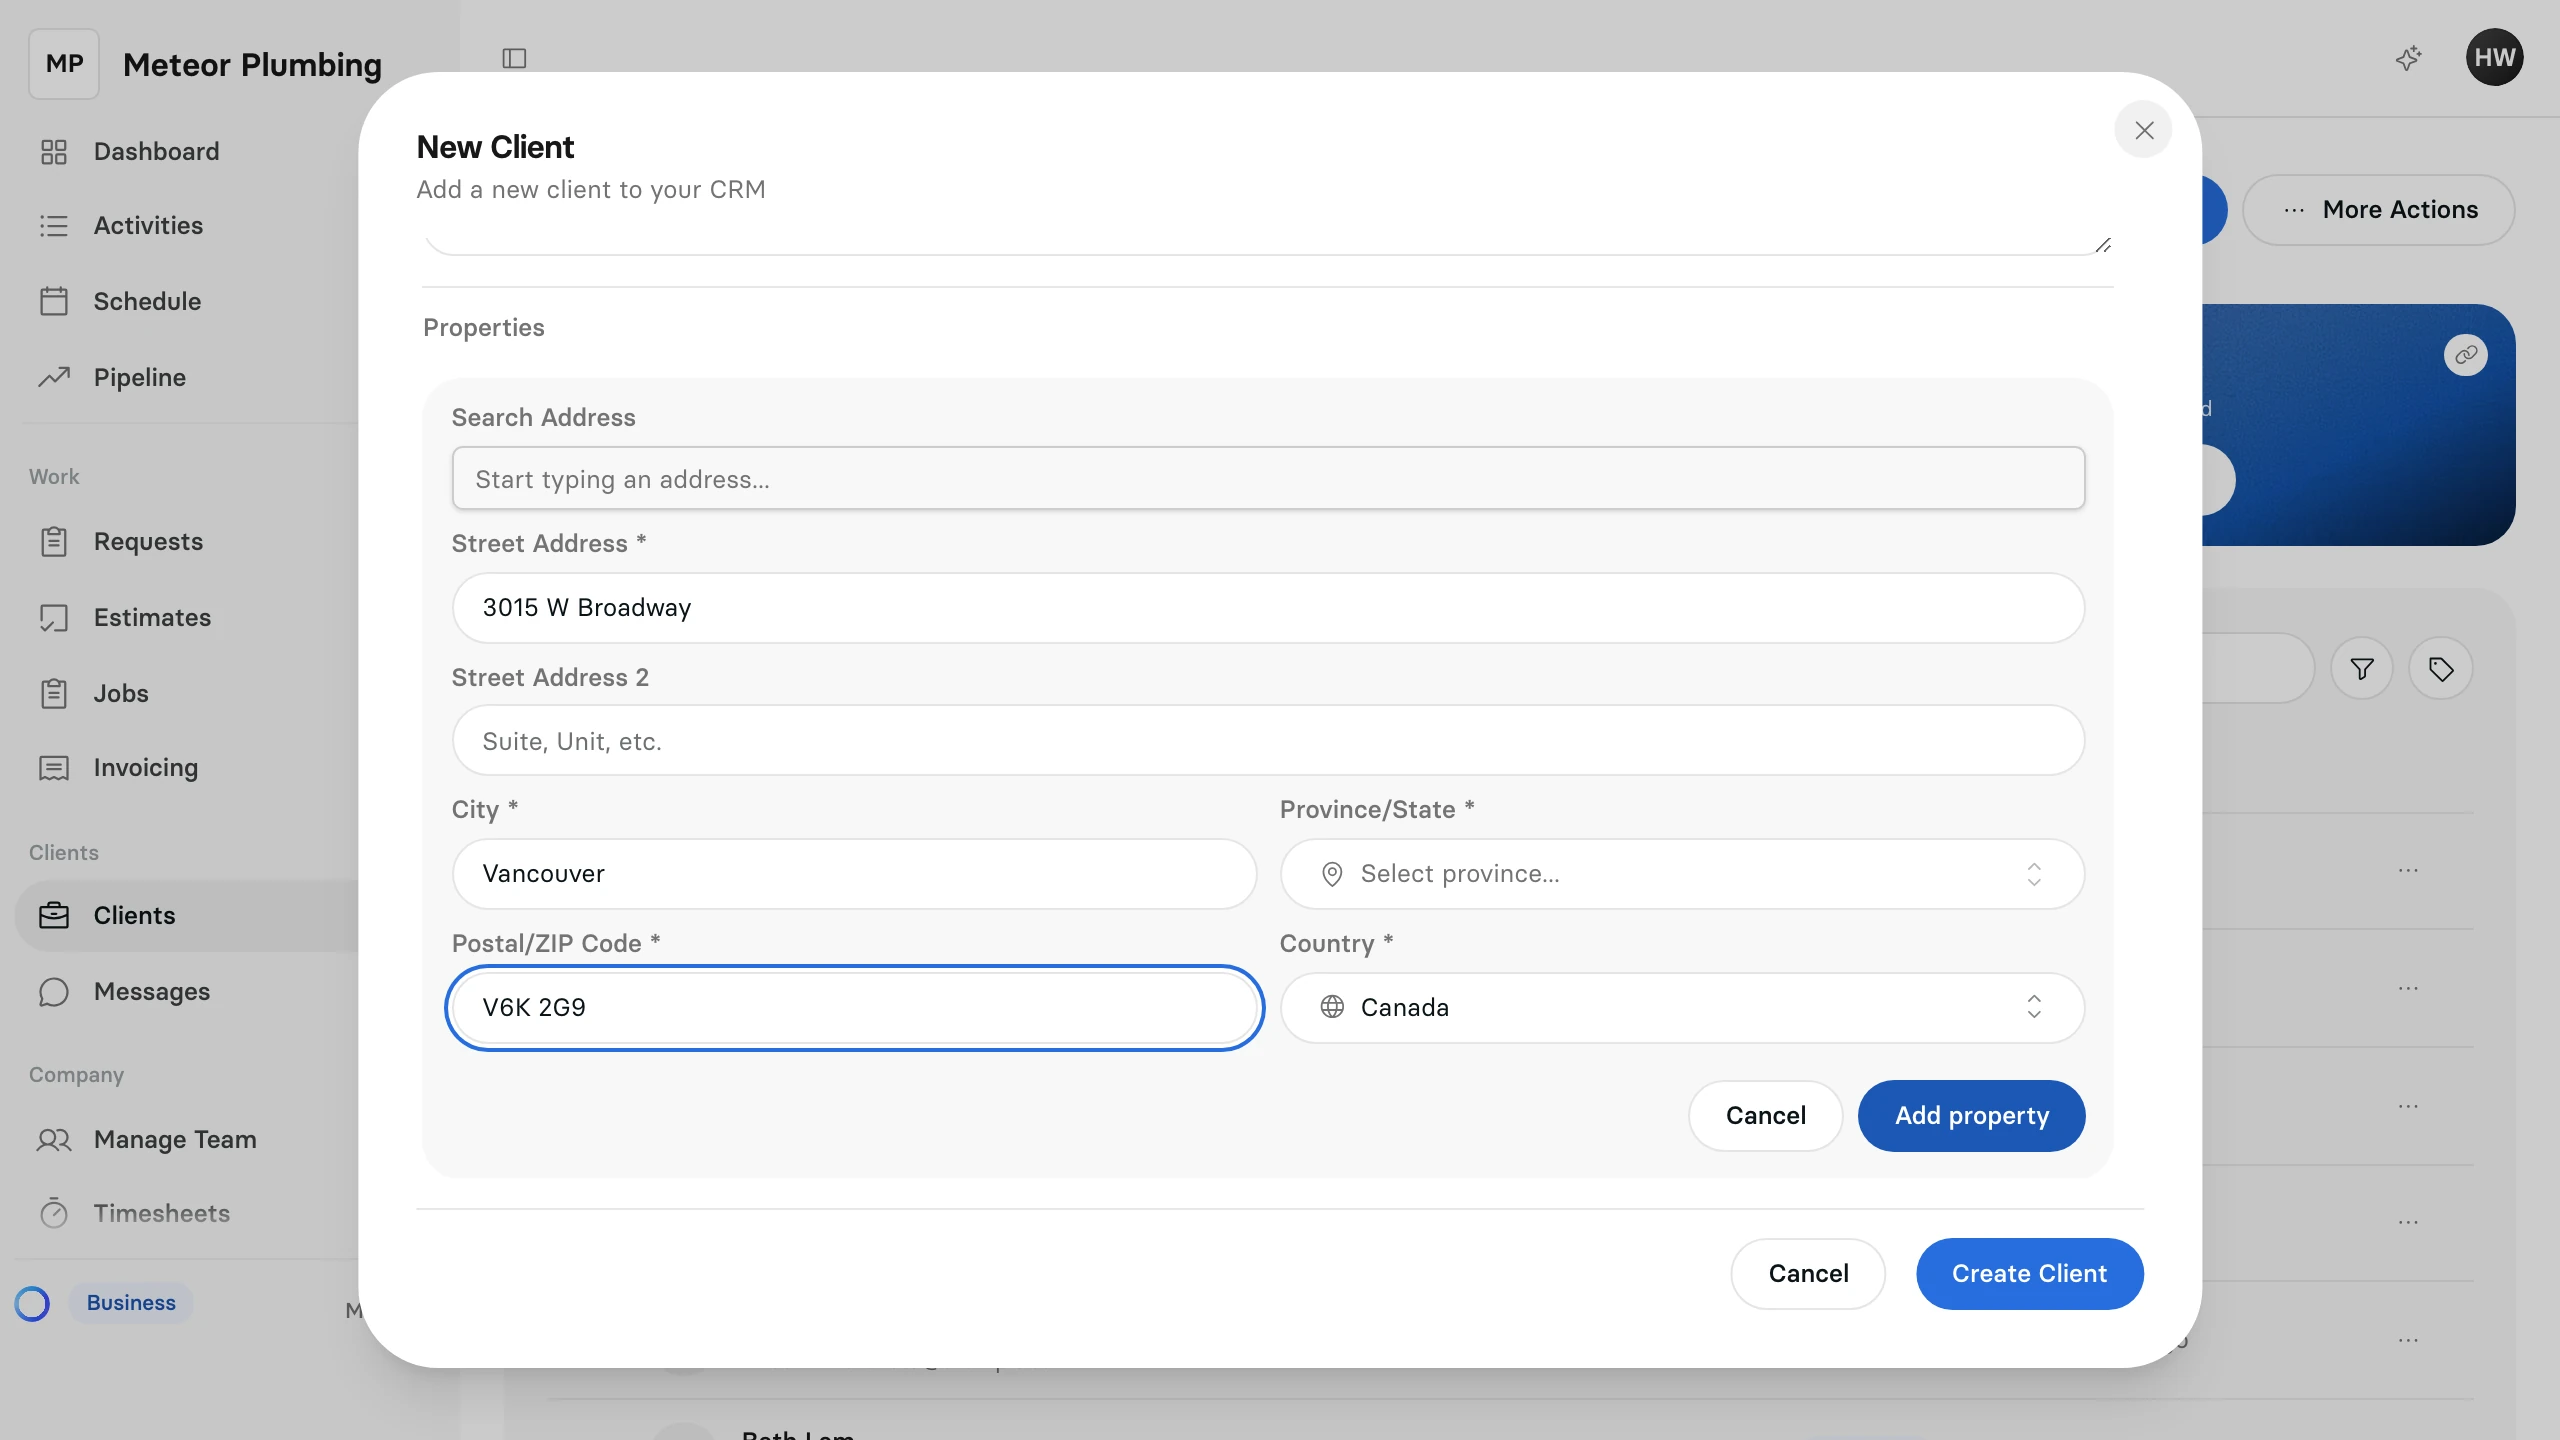
A property is an address where you do work for the client. You can add one or more while you create the client.
- Under Properties, select Add property.
- Start typing in Search Address and pick the address, or fill in Street Address, City, Province/State, Postal/ZIP Code and Country yourself.
- Select Add property below the address.
Organise your clients
In the same window, use Tags to group clients, and Notes for anything your team should know before a visit.