
Fill in and send an inspection report
Turn a checklist into a client report, fill it in on the visit, issue it as a numbered PDF with your logo, and email it or share a link.
Updated
On this page
Before you start
Inspection reports come with the Pro and Business plans, and with the free trial. They live under Reports in the menu.
A report belongs to a visit, so the job and its visit must exist first. See Schedule a visit.
What you can do depends on your role:
- An Org Admin or a Manager sets up report checklists, and fills in, issues and sends any report.
- A Technician fills in, issues and sends the reports of their own visits.
- A Dispatcher or a Technician (limited access) fills in reports on their own visits but cannot issue them. They mark a report ready, and someone who can issue it takes it from there.
- A Viewer can read reports but not change them.
Turn a checklist into a report
A report is a checklist with Client report switched on. Its questions are the report's: what you found, readings, photos and a signature.
The first time you open Reports, it offers two ways to start:
- Use the example checklist adds "Site inspection (example)" to your checklists, ready to change.
- Build my own starts an empty checklist with Client report already on.
To turn a checklist you already have into a report:
- Open Settings and select Checklists.
- Select the checklist.
- Switch on Client report.
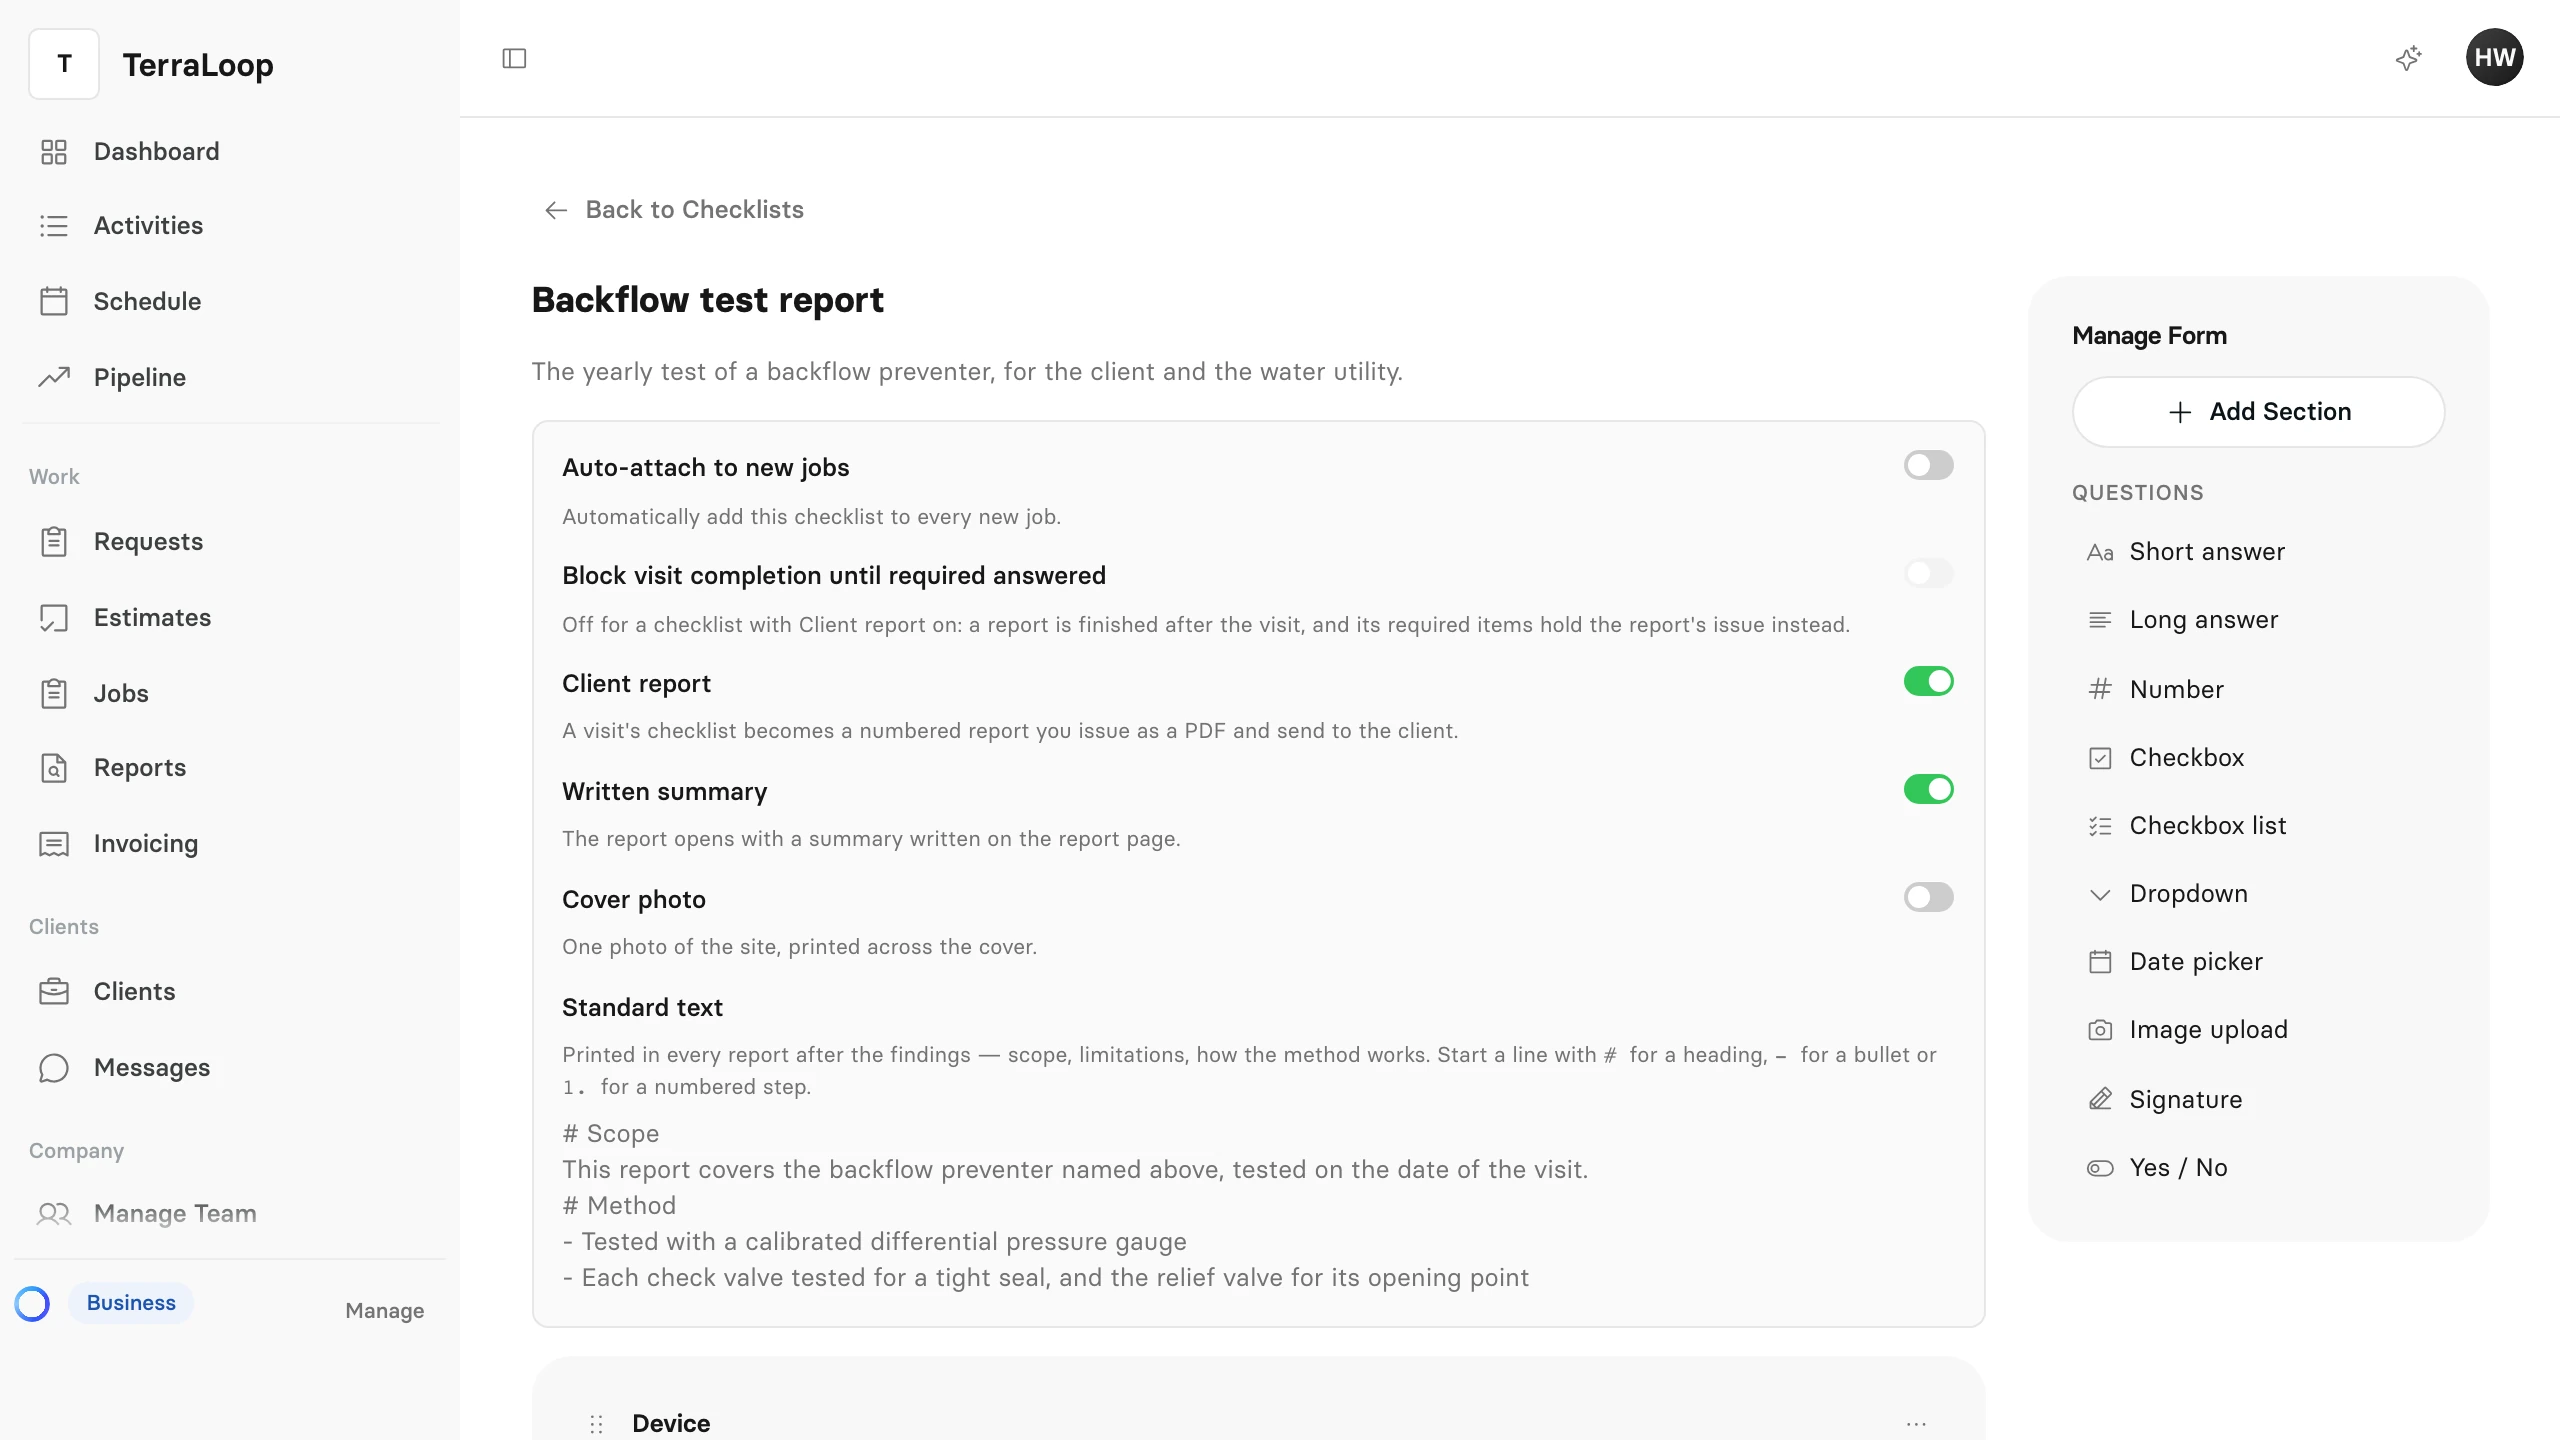
With Client report on, three more settings decide what the report prints besides the answers:
- Written summary opens the report with a summary you write on the report page.
- Cover photo prints one photo of the site across the cover.
- Standard text prints in every report after the findings: your scope, limitations or method.
Start a report
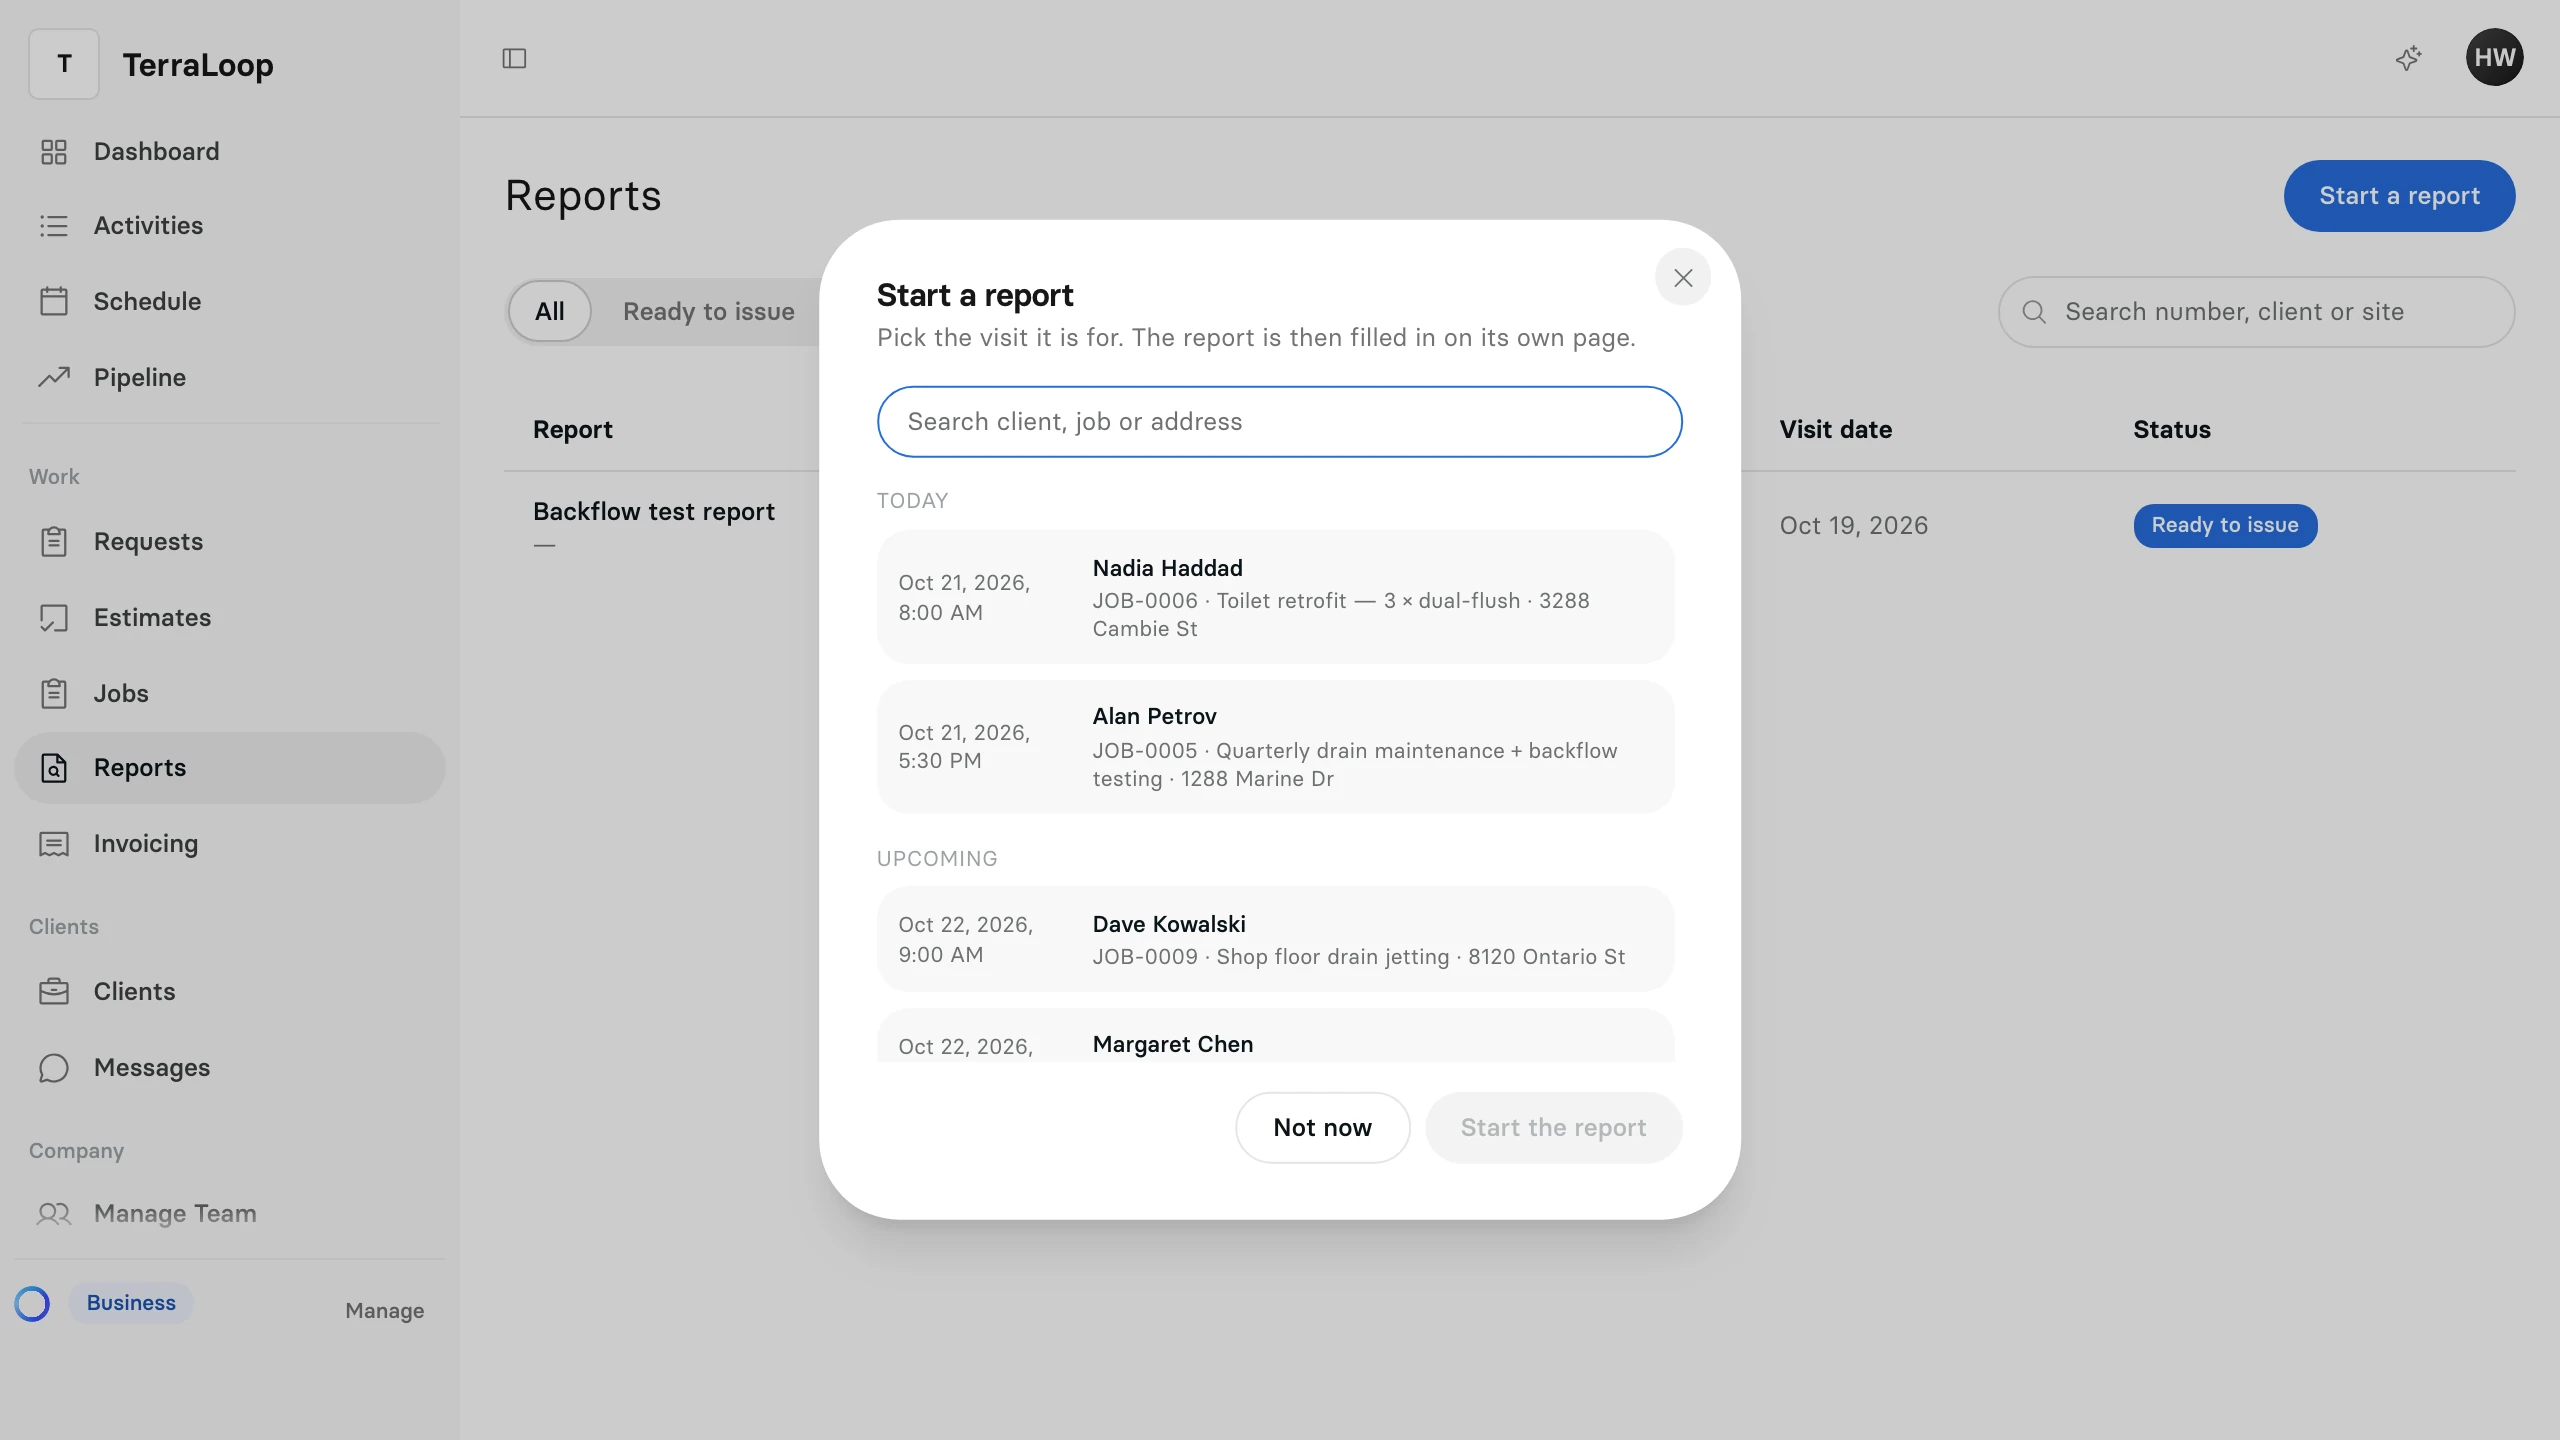
- Open Reports and select Start a report.
- Pick the visit. The list shows visits from two weeks back to two weeks ahead; search by client, job or address for any other.
- If you have more than one report checklist, choose one under Which checklist.
- Select Start the report. A visit that already has one says Has a report · Open, and the button becomes Open the report.
You can also start one from the visit itself: on the job, under the visit, select Add report and pick the checklist.
Fill it in
The report opens on its own page.
- Answer each question. Every answer saves as you go, and the top of the page says Saved.
- Add photos to the photo questions. Each printed photo gets a number.
- Have the person signing draw their signature on the screen, with a finger or a mouse. Type their name in Name of the person signing, or leave it empty to use your own.
- Write the Summary if the checklist has one. It prints after the cover.
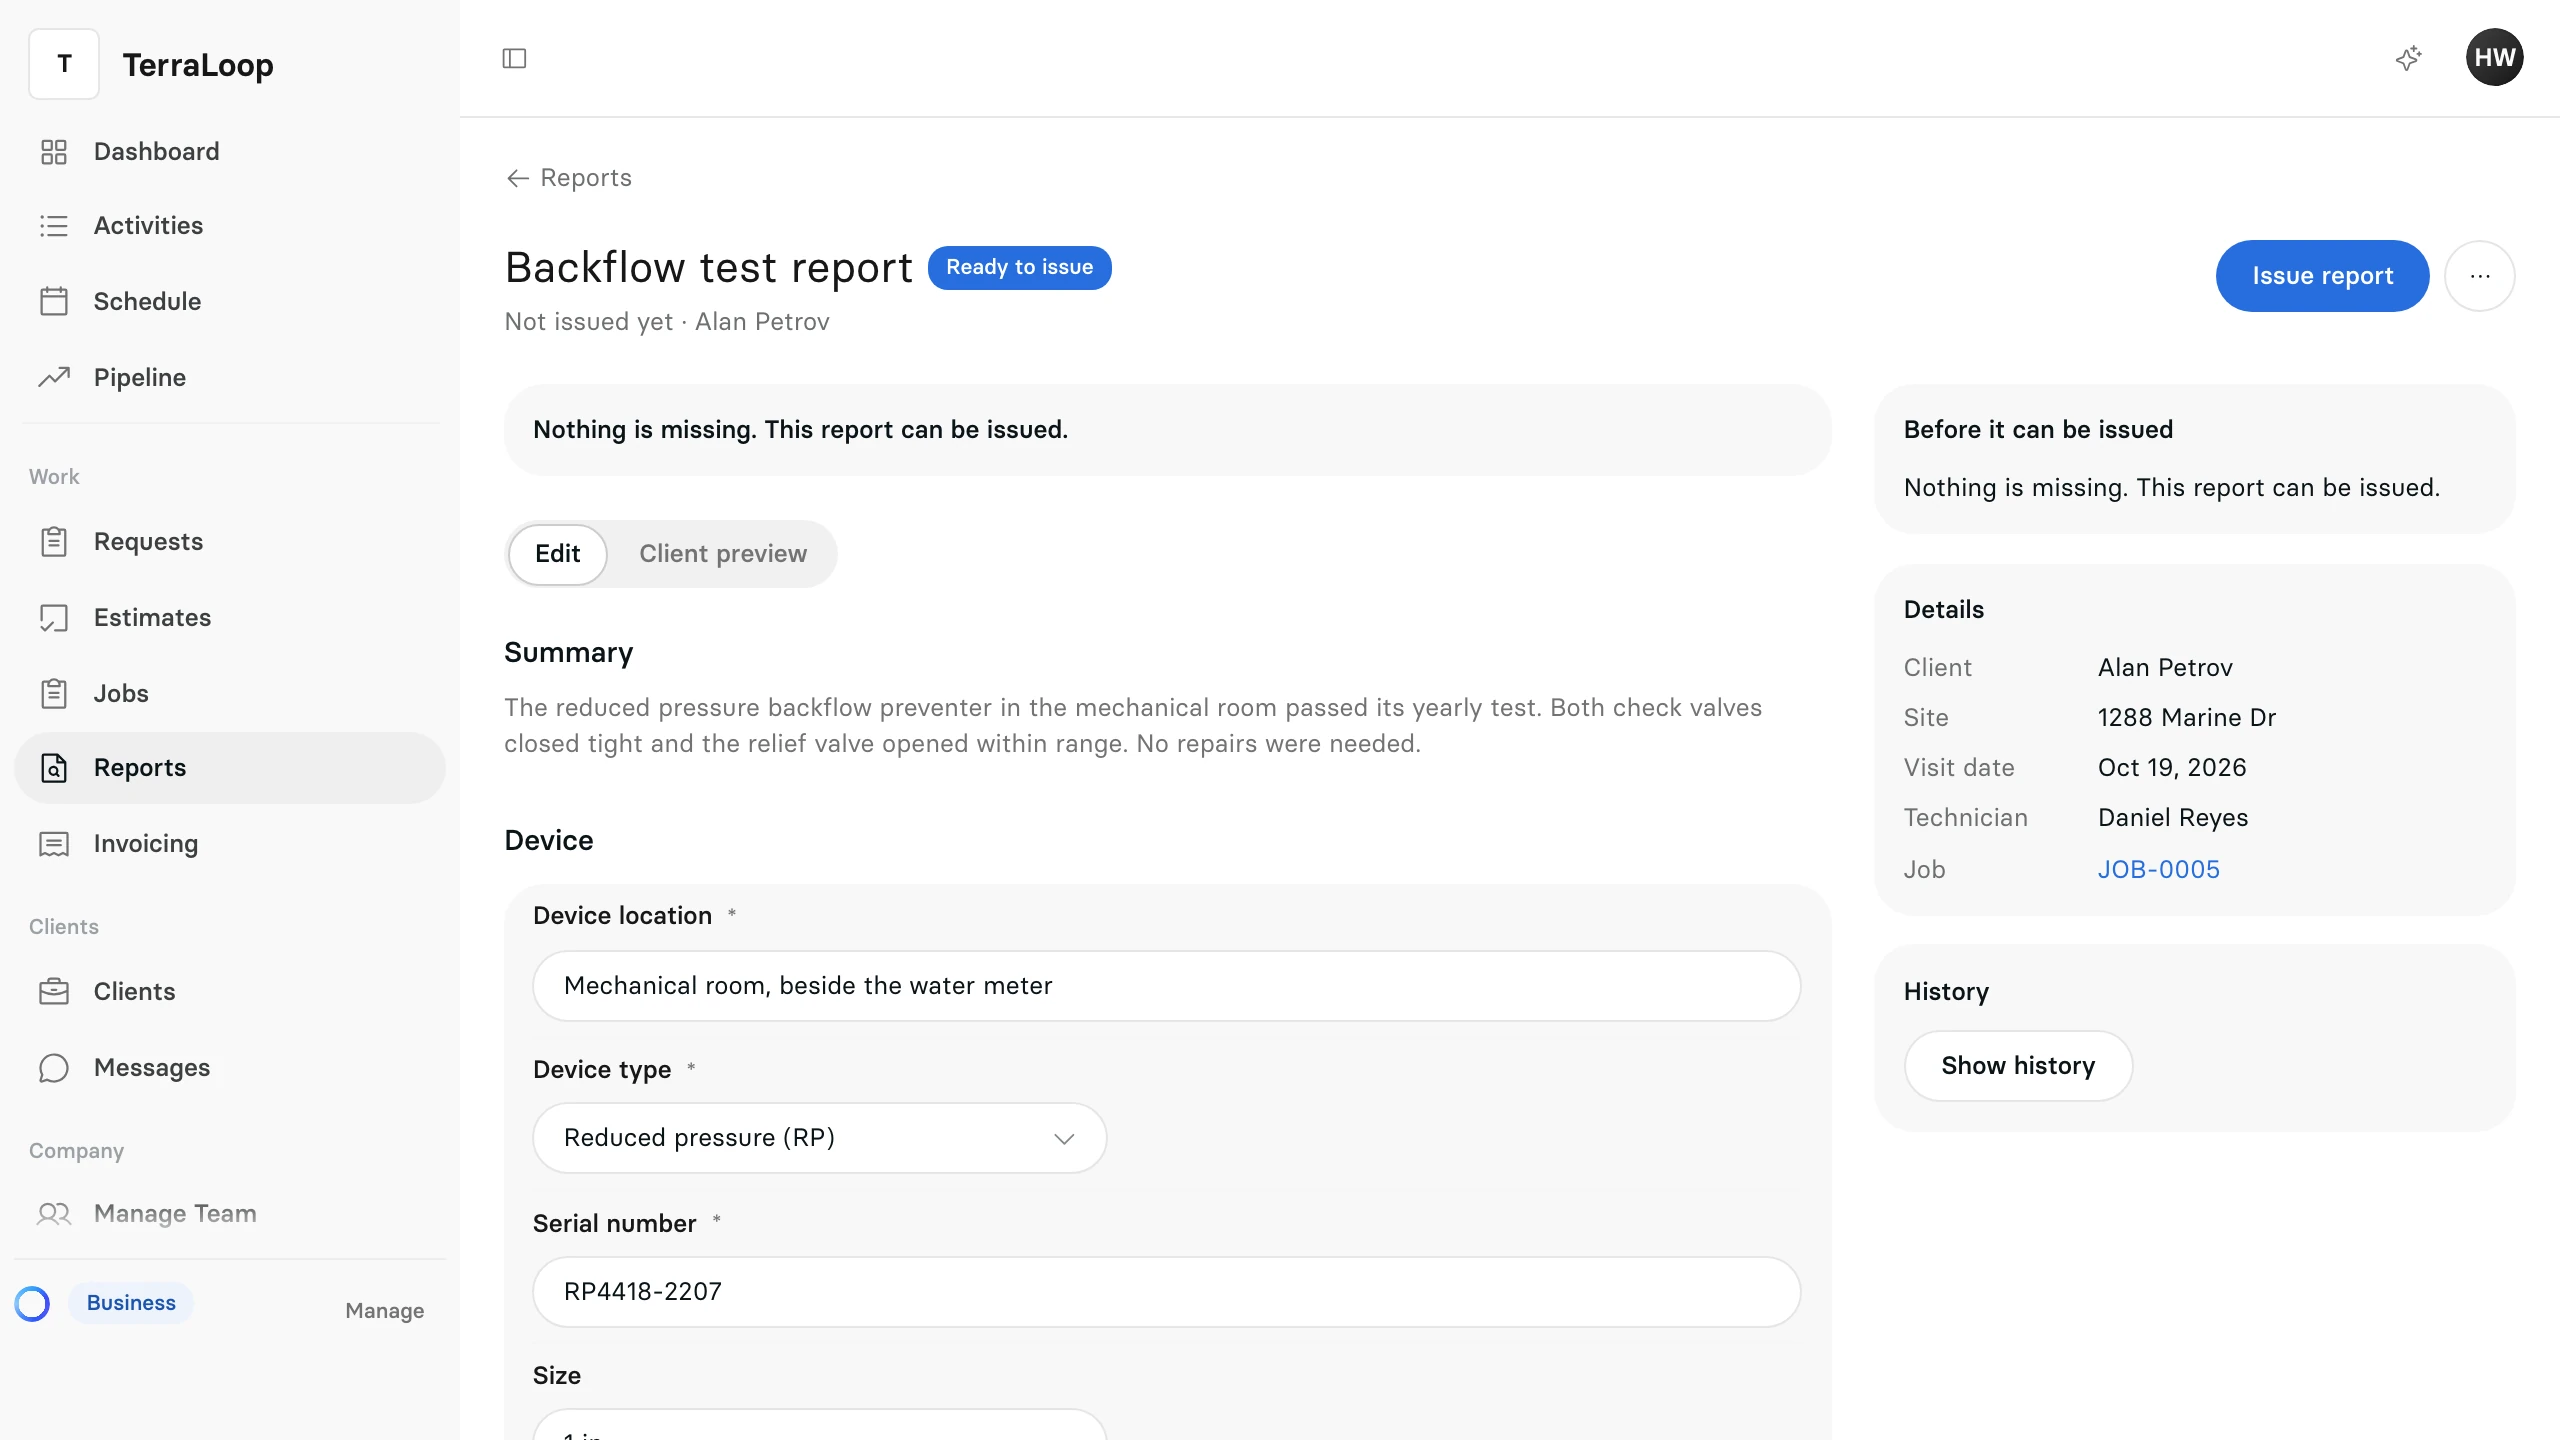
Select Client preview to see the document your client will get, marked DRAFT until it is issued.
Technicians can fill in the same report from the Clevra mobile app.
Issue it
Issuing gives the report its number and stores it as a PDF with your logo, the answers and the signature.
- Select Issue report. While a required answer is missing, Before it can be issued lists what to fill in first.
- Select Issue report again in Issue this report?.
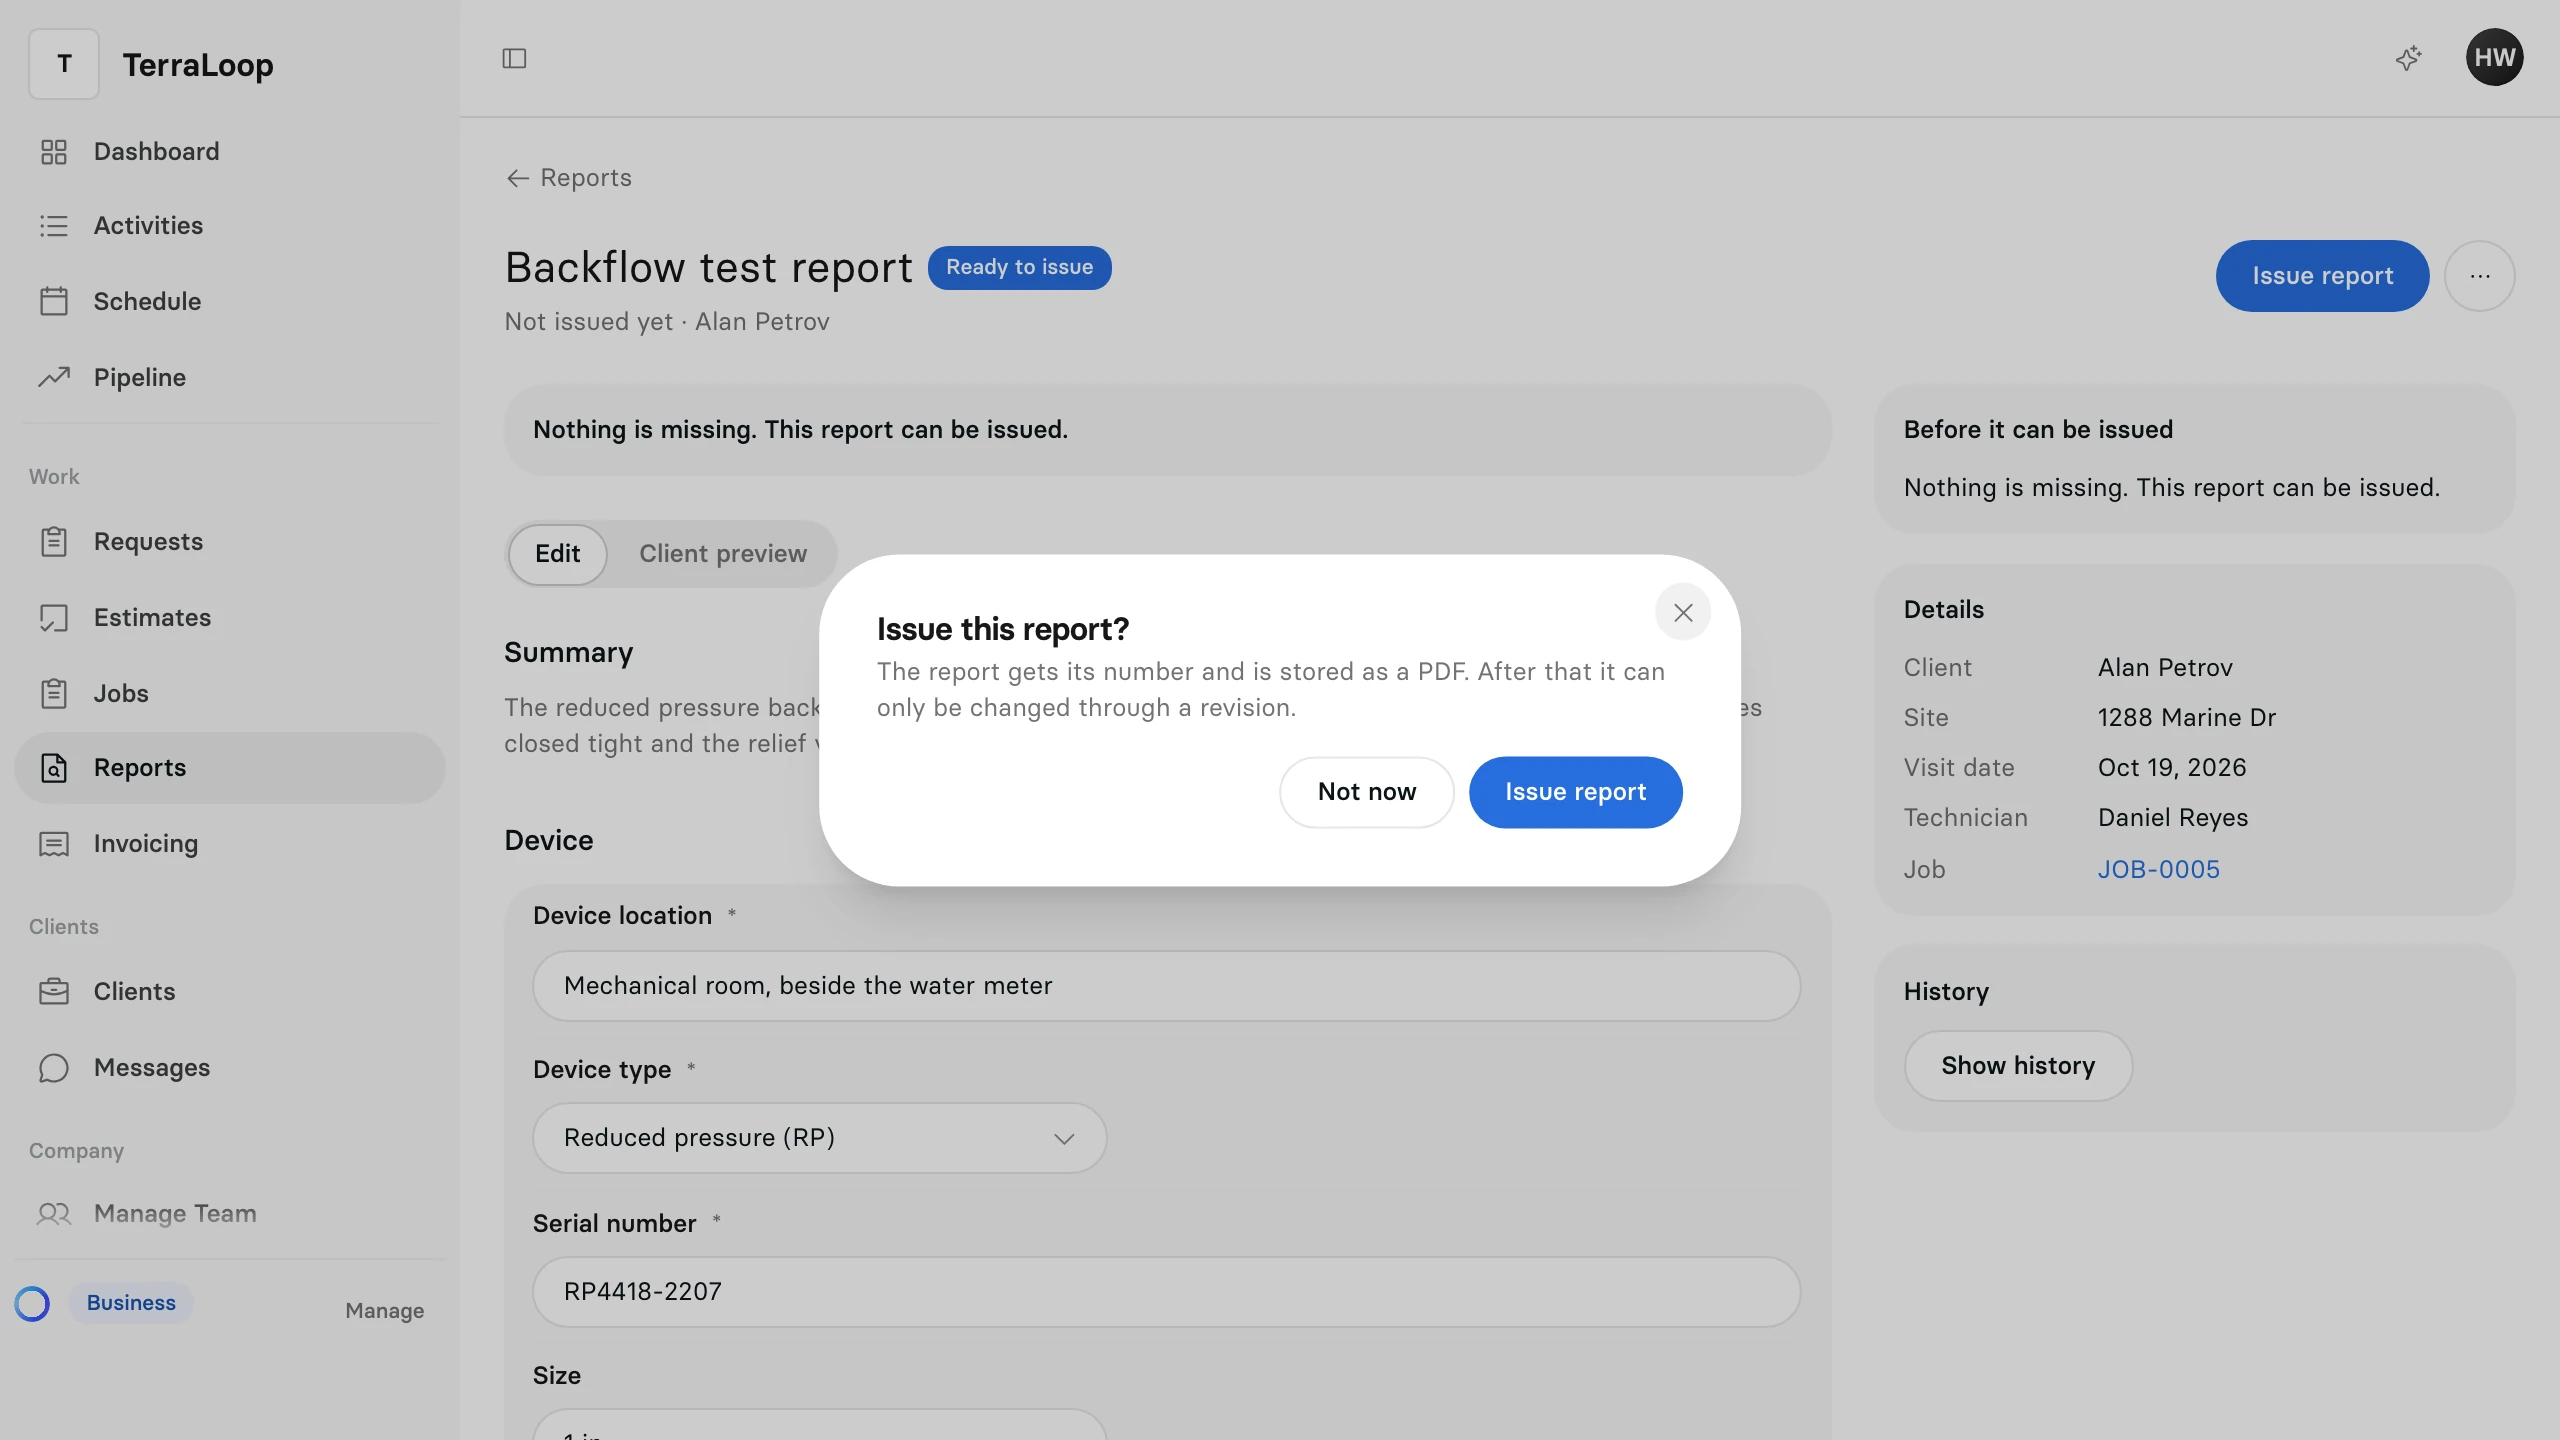
After that, the report changes only through a revision (see below).
Send it to your client
- On the issued report, select Send to client.
- Check the addresses in To. You can send to up to ten.
- Change the Subject if you like, and add a Message (optional).
- Select Send.
The email carries a secure link to the report, and the PDF itself when it is 7 MB or smaller. Your message goes only to clients who agreed to receive email from you.
To share the report another way, open the more actions menu (⋯) and select Copy link. Anyone with the link can open the report for a year. No email is sent.
Sent and links on the report shows each send and link, and when your client opened it.
Change an issued report
- To correct something, select Create revision in the more actions menu and say what is being corrected; the reason prints on the cover of the new version. Make the changes, then select Issue version 2. Your client keeps seeing the last issued version until then. Versions keeps every one.
- To withdraw a report, select Void report and give the reason. Every link stops working and the report cannot be sent again.
- To stop the links working without voiding the report, select Revoke links. You can send it again afterwards.